
- Oct 20, 2019
- 2,016
- 9,550
I'm recommending
I´m going to use a poor render as an example of what you can achieve with Krea.ai

1. Go to the enhance section
2. Choose the settings.
Strength: how much AI intervention do you want.
Resemblance: less resemblance means that your render will change more, but it also will look more realistic.
Clarity: it changes the sharpness and detail of the image.
This is the result of the default settings after pressing enhance

As you can see, she looks like another person, because the resemblance is very low, 0.38. But at the same time the image looks a lot more realistic.
If you drop the resemblance even more, to 0.10, the render looks even more realistic.

Despite of the realism, an image like that will not work in a visual novel because you will not have control in the character appearance, she will look like another person too in another render. There will be no consistency.
My advice is to keep the resemblance near to 0.90. The AI works better with closer shots, so, in a close up you can drop the resemblance to 0.70 and the characters could keep their looks.
0.92 of resemblance:

As you can see the image improved a lot and she still looks like the same person.

But the new image looks too artificial, it has that AI look that many people don't like. That's because of the clarity, if you increase the resemblance, you need to decrease the clarity for a more natural look.
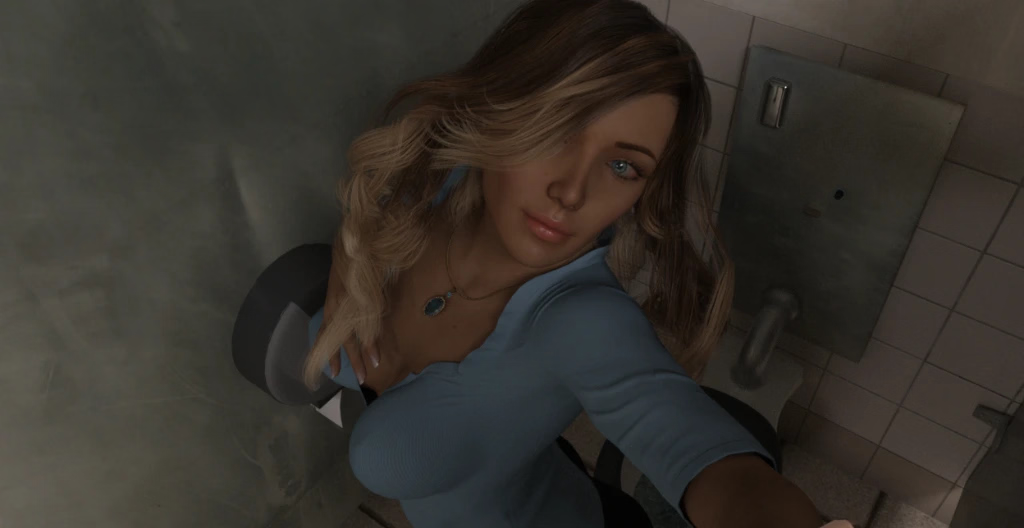
This would be the image I recommend. With clarity at 0.07.

As you can see, the image looks more natural, it doesn't have that AI look anymore.
Comparisson:
Before and after

3. Patch enhance: a tool that allows you to improve just a segment of the image without modifying the rest.
Right click over the image, select patch enhance area and draw the area you want to modify keeping the left click pressed. You can write what do you want to change in the prompt.

You can keep the space bar pressed to move the image, sometimes the patch box is out of the screen.
Result:
.jpg")
If you want a bigger change, the patch also has settings you can control

.jpg")
4. Be careful with long shots with several characters.
As I said before, the AI works better with closer shots. Take this render, for example:

Even with higher resemblance, 0.95, and lower clarity, 0.05, the faces change a lot and there are some problems with some hands and eyes.

In this case you have to decrease the strength too. This one is with the strength at 0.23.

But there's barely any improvement in this case. The original render was already fine. Enhacing a long shot with several characters should be reserved to low quality renders only.
5. Plans


You can also enhance animations, but the resemblance is lower in the videos enhanced.
You must be registered to see the links
to enhance the renders because it allows you to control settings like resemblance, so, you can keep the original features of the characters. Besides, Krea.ai allows you to enhance your image up to 8192px (2048px in the free version). The enhancing process takes less than a minute. You can use Krea for free, it gives you around of 15 enhanced images per day and per account.I´m going to use a poor render as an example of what you can achieve with Krea.ai
1. Go to the enhance section
You must be registered to see the links
and upload the render.2. Choose the settings.
Strength: how much AI intervention do you want.
Resemblance: less resemblance means that your render will change more, but it also will look more realistic.
Clarity: it changes the sharpness and detail of the image.
This is the result of the default settings after pressing enhance

As you can see, she looks like another person, because the resemblance is very low, 0.38. But at the same time the image looks a lot more realistic.
If you drop the resemblance even more, to 0.10, the render looks even more realistic.

Despite of the realism, an image like that will not work in a visual novel because you will not have control in the character appearance, she will look like another person too in another render. There will be no consistency.
My advice is to keep the resemblance near to 0.90. The AI works better with closer shots, so, in a close up you can drop the resemblance to 0.70 and the characters could keep their looks.
0.92 of resemblance:

As you can see the image improved a lot and she still looks like the same person.

But the new image looks too artificial, it has that AI look that many people don't like. That's because of the clarity, if you increase the resemblance, you need to decrease the clarity for a more natural look.
This would be the image I recommend. With clarity at 0.07.

As you can see, the image looks more natural, it doesn't have that AI look anymore.
Comparisson:
Before and after

3. Patch enhance: a tool that allows you to improve just a segment of the image without modifying the rest.
Right click over the image, select patch enhance area and draw the area you want to modify keeping the left click pressed. You can write what do you want to change in the prompt.

You can keep the space bar pressed to move the image, sometimes the patch box is out of the screen.
Result:
.jpg")
If you want a bigger change, the patch also has settings you can control

.jpg")
4. Be careful with long shots with several characters.
As I said before, the AI works better with closer shots. Take this render, for example:

Even with higher resemblance, 0.95, and lower clarity, 0.05, the faces change a lot and there are some problems with some hands and eyes.

In this case you have to decrease the strength too. This one is with the strength at 0.23.

But there's barely any improvement in this case. The original render was already fine. Enhacing a long shot with several characters should be reserved to low quality renders only.
5. Plans


You can also enhance animations, but the resemblance is lower in the videos enhanced.
Last edited:
