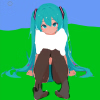
Your noob to expert guide in making great AI art.

5.00 star(s) 1 Vote

NoTraceOfLuck

Member
Game Developer
Apr 20, 2018
291
478
Hey all, this is a guide I have wanted to make for a long time. I have learned so much about AI art while creating my game and figured it was time to share the knowledge.

Disclaimer: This guide is OPINIONATED! That means, this is how I make AI art. This guide is not "the best way to make AI art, period." There are many MANY AI tools out there and this guide covers only a very small number of them. My process is not perfect.

Hardware Requirements:
  • The most important spec in your PC when creating AI art is your GPU's VRAM. It really doesn't matter how old your GPU is (though newer ones will be faster), the limiting factor on what you can and cannot do with AI is almost always going to be your GPU's VRAM.
  • This guide may work with as little as 4gb of VRAM, but in general, it is recommended that you have at least 12gb, with 16gb being preferred.

No hardware? No problem:
  • If you do not have a good GPU, or just want to try some things out before buying one, the primary tool that I use in this tutorial offers a paid online service. It is the exact same tool it just runs on the website and costs money per month.
  • You can check it out here:

GPU Buying Guide:
  • Buying Nvidia will be the most headache free way to generate AI art, though it is generally possible to make things work on AMD cards with some effort. This guide will not cover any steps needed to make things work on AMD GPUs, though the tools I use all claim to support AMD as well.

On a tight budgetUsed RTX 4060 TI (16gb VRAM)This card is modern, reasonably fast, and has 16gb of VRAM
Middle of the roadRTX 5070 TI (16gb VRAM)This has the 16gb of VRAM, but will be signifiicantly faster than a 4060ti
High VRAM on a budgetUsed RTX 3090 (24gb VRAM)If you want 24gb of VRAM to unlock higher resolutions and the possibility of video generation, the RTX 3090 is the most reasonable option
Maximum powerRTX 5090 (32gb VRAM)If you have deep pockets the RTX 5090 has the most VRAM of any consumer card and is much faster than the RTX 4090

The RTX 4090 is a great card, but prices are extremely high right now. If you can find a deal, that's another good buy.


Installation and Setup:
  • The tool I will use in this tutorial is called Invoke. It has both a paid online version, and a free local version that runs on your computer. I will be using the local version, but everything in this tutorial also works in the online version.
    • Website:
  • These steps specifically are how to install the local version. If you are using the online version, you can skip all of these steps.

  1. Download the latest version of Invoke from here:
    1. 1748319035728.png
  2. Run the file you downloaded. It will ask you questions about your hardware and where to install. Continue until it is installed successfully
  3. If you have a low VRAM GPU (8gb or less) to greatly improve speed, follow these additional steps:
  4. Click Launch


Now, you will get a window like this:

1748319348728.png


Understanding Models

Now, the most important part of AI generation: selecting a model. What is a model? I will spare you the technical details, most of which I don't understand either. Here's what you need to know about models:

  1. Your model determines how your image will look.
    1. If you get an anime model, it will generate anime images
    2. If you get a realism model, it will generate images that look like a real photograph
  2. Each model "understands" different things.
    1. One model might interpret the prompt "Looking at camera" as having the main character in the image make eye contact with the viewer
    2. A different model might interpret the prompt as having the main character literally look at a physical camera object within the scene

Your base model is the most important thing in determining how your images will look. Here are some links to some example models (note, there are thousands and thousands of models available.)

Anime Models
    • This is a popular anime model.
    • This is also an anime model, however it produces a different style of illustration from the other model.
    • This anime model produces images in more of a '3D style'

Realism Models
    • This is the most popular realism model. However, I will have a section below specifically on Flux which covers some things you will need to know before using it.
    • While realism models don't technically have different 'styles' like anime does, it is important to note that different realism models produce different styles of realism. Some models might be better at creating old people. Some might produce exclusively studio photography style images. Some might produce more amateur style images of lower quality.


Generating Your First Image

Alright, with all that new knowledge in your head, I will provide a recommended model for the remainder of this tutorial.

We will use which is a very popular anime model that is based on Illustrious.

To download this, you will require an account on Civitai. Civitai is the primary space in which users in the AI community share models. Create an account and then continue on with this tutorial.

After you've created an account, to install this model, right-click here, and click 'Copy Link'

1748323492840.png


Now, go back to Invoke and click here:

1748323539735.png

Then, paste the link here, and click Install:

1748323612438.png


Most models are around 6gb, however Flux is around 30gb.

When it is done, you will see it here:

1748323712197.png


Now go back to the canvas by clicking here:

1748323746860.png


You will see the model has been automatically selected for you. But if you chose to install other models too, you can select the model here:
1748323823755.png


Now, enter these prompts:

  • Positive Prompt
    • masterpiece, best quality, highres, absurdres, hatsune miku, teal bikini, outdoors, beach, sunny, sand, ocean, sitting, straight on, umbrella, towel, feet
  • Negative Prompt
    • bad quality, worst quality, worst aesthetic, lowres, monochrome, greyscale, abstract, bad anatomy, bad hands, watermark
1748324152721.png


And click 'Invoke'

Congratulations You have made your first image:

1748324479211.png


Now, you can create great AI art using only what you've seen so far and you're free to stop and experiment here. However, this is only the beginning of what you can do with AI.


In part 2, I will start to get into more tools and options you have available.
 
Last edited:

NoTraceOfLuck

Member
Game Developer
Apr 20, 2018
291
478
Before we move on, let me provide some more detail on what we just did.

Basic AI Concepts:

We entered this as a 'positive' prompt:
masterpiece, best quality, highres, absurdres, hatsune miku, teal bikini, outdoors, beach, sunny, sand, ocean, sitting, straight on, umbrella, towel, feet

We entered this as a 'negative prompt':
bad quality, worst quality, worst aesthetic, lowres, monochrome, greyscale, abstract, bad anatomy, bad hands, watermark

Positive Prompt: The positive prompt is what you want to see in the image. If you mention something in the image, if the AI has an understanding of that concept, it will try to place it in the image somewhere.

Negative Prompt: The negative prompt is what you don't want to see in the image. If you find that the model is putting things in the image that you do not want, you can place them in the negative prompt to encourage it not to place that in the image.


1748325749651.png

Resolution: Resolution is a very important factor in getting a quality image. Images should be generated in one of the following aspect ratios. The further you diverge from these aspect ratios, the worse the quality of your image will be:
1748325860395.png


Seed: The 'Seed' is a random number generated for each image. If you generate an image with all of the exact same settings and the exact same seed, you will get the exact same image every time. Keeping the seed as a single static value can let you compare the outputs of different models or different settings.

In the 'Advanced' section:

1748326105246.png


Scheduler:
Generally most models will recommend a specific scheduler for the best quality. Each model can have a different "best" scheduler. You can find this in the description of the model.

However, in general:
  • If you model supports it, "DPM++ 2M Karras" will produce the best quality. However, many models don't support it
  • "Euler Ancestral" is supported by almost all models. If you're unsure, or they don't specify, you can almost always use this.
I use those 2 schedulers almost exclusively.


Steps: Steps are an important concept in AI. Again, most models will recommend a "best" amount of steps in their description. However, for most models it is generally between 28 and 35. "Steps" are effectively how long the models spends "thinking" before creating a final output. Decreasing the steps will speed up the generation, but can reduce quality if too low. Increasing the steps too high can also decrease quality.

CFG Scale: If your images look burned / deep fried, often this setting can be the culprit. Again most models will recommend a "best" CFG. However, it is generally between 3.5 and 7.5. I usually stick at 5 and rarely change it.


Popular Model Differences

I selected as the model for this example. But what is this model, and why did I select it? What if you had chosen a different model?

Here is what you need to know:

There exists a set of models which I will call 'Base Models.' These models are the foundation of almost every other popular model.

Base Models: These models serve as the "core" of other models. A new base model costs a LOT of $$$$ to create and requires a large amount of community involvement to build tools for. There are currently 3 base models which have reached widespread popularity. Almost all other models are built on top of these 3 core models, and each of these 3 core models has different strengths.

Currently Popular Base Models

Base ModelNotes
SD 1.5 (Stable Diffusion 1.5)SD 1.5 is an "old" model. The results tend to be lower quality and more chaotic. Because this model is older, it is great for low-end PCs, or for generating images very quickly on modern higher-end PCs.

SD 1.5 is best used with 512x512 images

SD 1.5 is so fast it can even run in PCs that don't have a GPU at all.
SDXL (Stable Diffusion Extra Large)SDXL is currently the go-to model in most cases. It is an extremely flexible model and the hardware requirements are not too high. It can work on GPUs with 8gb of VRAM or more and can be quite fast on a modern PC.

SDXL is best used with 1024x1024 images

All popular anime models are based on SDXL.
Flux DevFlux is the newest 'base model' to gain mainstream popularity. Flux has a lot of stipulations alongside it.

  • Flux is primarily for realism style images. It produces the highest quality realism images out of any of these 3 models.
    • There are a few non-realism styles that Flux can do, but overall it is very limited in style and its main strength is realism.
  • Flux has high hardware requirements and is much slower than SDXL.
  • Flux has extremely strong "prompt adherence." I will explain "prompt adherence" in the next section.
  • Flux generally struggles with NSFW concepts and nudity


Large Finetunes:

While 'base models' are the core of most other models, it is generally rare to use the base model itself to generate images (Flux is the one exception). Instead, it is more common to use a "Finetune"

Finetune: A finetune is a model which started as one of the 3 base models, but somebody continued training it on more images to try and teach it new concepts, or try and transform the model into a new style or otherwise improve it in some way. Some finetunes train with hundreds or thousands of new images.

While most finetunes are relatively small, there are a few which are HUGE. Some finetunes perform additional training on base models that requires months of work and millions of images. These finetunes are so extensive, that you can often treat these almost as new "base models." (Though, at their core, they are still just one of the 3 base models.)


There are 2 important concepts to know about finetunes:
  • Prompt Adherence: Prompt adherence is how "good" a model is at following your prompt. For example, if I type "A red square on the left, a blue circle on the right" and generate an image, if the model understands that and correctly places the shapes, it has "good prompt adherence", if it adds a yellow triangle into the image, then that is "bad prompt adherence".

  • Quality Tags: Some models require "Quality Tags". These are tags that enhance the quality of the output, and generally should always be included in every generation. I have included a column for each model's preferred quality tags below.
    • Quality tags should always be put at the beginning of your prompt


Example Large Finetunes:

ModelWhat is itHow To Prompt ItQuality Tags
Pony was one of the first wildly successful anime finetunes of SDXL.

Pony is extremely flexible with styles and learning new concepts. While the model is poor at prompt adherence compared to newer models, the ability to faithfully replicate styles makes it still a worthwhile tool in your AI toolbox.

Base Model: SDXL
Pony has been trained to understand "Danbooru tags"

Danbooru tags are tags from the Danbooru imageboard:

Pony does NOT understand natural language concepts. It only understands danbooru tags.

Example prompt:

1girl, megumin, red dress, waving
Positive Prompt:
score_9, score_8_up, score_7_up, score_6_up, score_5_up, score_4_up

Negative Prompt:
score_6, score_5, score_4

(Note you must include that full list of tags, do not try and remove parts of it, read more about it here: )
Illustrious is the 'next generation' anime model and has replaced Pony in most cases.

Illustrious has much better prompt adherence.

Illustrious is not quite as flexible as Pony stylistically. So it is not as good as replicating exact styles. However, it still produces beautiful images.

Base Model: SDXL
Illustrious is also trained on Danbooru tags. However, it also has limited understanding of non-danbooru concepts.

Example prompt:
1girl, megumin, red dress, waving
Positive Prompt:
masterpiece, best quality, highres, absurdres

Negative Prompt:
bad quality, worst quality, worst aesthetic, lowres, monochrome, greyscale, abstract, bad anatomy, bad hands, watermark,
NoobAI is the newest contender in the anime space.

Noob is a very unique finetune. It is actually a finetune of Illustrious, so it retains many of the strengths of Illustrious.

Noob, as a base model, produces very chaotic images. However, it tends to be much more creative and expressive.

Noob is great for testing concepts and for inspiration.

Base Model: SDXL
NoobAI is also trained on Danbooru tags.

Example prompt:
1girl, megumin, red dress, waving
Positive Prompt:
masterpiece, very awa, best quality, year 2024, newest, highres, absurdres

Negative Prompt:
bad quality, worst quality, worst aesthetic, lowres, old, monochrome, greyscale, abstract

Note, NoobAI has some control over year and recency for images. I put 'year 2024' which means it will take the style of images released in 2024. If you would like to replicate a different year, you can enter that different year instead.

The 'newest' tag also controls how recent the training data should be. If you want old images to influence your image, remove this tag.
Flux is actually not a finetune, but I am listing it here because it is very popular for realism style images.

Base Model: Flux
Flux is much different from the previous models.

Flux is prompted using 'Natural Language' and responds best to very long, very detailed prompts. It is generally recommend to take your prompt and send it to ChatGPT and ask it expand your prompt and make it more detailed.

Flux has extremely good prompt adherence. Much better than any of the other models here.

Example prompt:

A young woman sits gracefully on a wooden swing suspended by ropes. She is mid-wave, her hand lifted in a friendly gesture, with a soft smile on her face. Her hair flows gently with the breeze, and the background shows a sunny, peaceful outdoor setting—perhaps a park or a garden. The mood is light, warm, and inviting.
Flux does not require quality tags. Note words like "gracefully" and "friendly" do influence the generation and are worth including.
 
Last edited:

NoTraceOfLuck

Member
Game Developer
Apr 20, 2018
291
478
Gaining More Control

At this point, if you have been experimenting with new images, you may started to run into one of two common issues with AI art.

Issue 1: The model does not understand your concept

or

Issue 2: You can't find the words to describe exactly the image or pose that you want. (This is covered in a later section)


This is where AI starts to get more technical than just "type in a prompt." You have a number of options for gaining more control over your output.


Adding LoRAs

If you're running into an issue where your model just cannot understand your concept, it's time to look into LoRAs. A LoRA allows you to inject new knowledge into the model.

There are many different types of LoRAs:
  • Style LoRA
  • Character LoRA
  • Concept LoRA
  • Other LoRA

A style LoRA allows you to completely change the style of your model. Let's see an example of a Style LoRA here:

This is the "Flat Color" Style. It should cause our output to appear in a flatter, more minimalistic style. There are also style LoRAs for pretty much anything you can think of, including styles for specific animes, games, artists, etc...

But before we add this LoRA, there are some important concepts to understand.

1: LoRAs are only compatible with the model they have been trained for. To use a LoRA with Illustrious, that LoRA needs to have been created specifically for Illustrious. Now, there are some exceptions to this due to the fact that almost all models are based off of SDXL so they do share some common underlying structure and can theoretically work. But in general, for the best success, you need LoRAs that were created specifically for the model you're using.

2: Some LoRAs have 'trigger words'. Trigger words are words that you add to your prompt to enable the LoRAs. Not all LoRAs have trigger words, some will just work.


So lets verify these 2 things with this new LoRA.

1748327295084.png


At the top, you can see this LoRA has been made for many different models. Including hidream, wan, hunyuan, illustrious, and noobai. The model we are using is based on Illustrious, so be sure the 'Illustrious' version is selected.

On the right side, you can see "Base Model" says "Illustrious" which confirms we have the correct model selected.

You can also see this model does have trigger words. Since it has them, we must use them.


Installing The LoRA

We install this LoRA in the same way we install base models.

Copy the link and download it like before. If it fails, try a few times.

1748327450703.png


Once it is installed, you will see a new LoRAs section:
1748327489526.png

Optional: If you don't want to permanently remember the trigger words, you can add them in to the model itself. I will do that now. Click on the model and enter the trigger words in the "Trigger Phrases" box. Note, this model has 2 trigger words, so be sure to get both

1748327574260.png


Now, lets go back to the main page. And take a look here. Click this and select the LoRA we just installed

1748327634882.png


You will notice a new box appear:
1748327661675.png

Weight: Weight is the measure of how strongly the LoRA will affect your image. Most model pages have a recommended weight. This model does not recommend any specific weight, so I will keep the default 0.75 However if you find the effect is too strong, or not strong enough, you can increase or decrease this. In some LoRAs, you can even go negative to produce the "opposite" effect of the LoRA

Now we need to add our trigger phrases. Up on the positive prompt, click here:

1748327779307.png

It will list the trigger words of any LoRAs you have selected. Add both of them. The prompt should now look like this:
1748327833261.png


Alright, lets see what it looks like! Click "Invoke"

1748327902302.png

Wow, looks great! Now you can see how LoRAs can affect the style of an image.

If you're feeling very adventourous, you can mix and match many different style LoRAs with different weights, and produce your own truly unqiue style recipe. There are some creators who experiment and find unique styles, and guard them closely.


Concept and Character LoRAs

Concept and Character LoRAs are the same as style LoRAs, except instead of influencing the style, they influence the structure of the image.

Character LoRAs can be used to add knowledge of characters that did not exist when the model was originally trained. Illustrious was trained in 2024. Any new character from 2025 will not be recognized by the model whatsoever.

You will simply locate character LoRAs, such as this one:

And install them and add the trigger word to influence the model to generate your character or concept.

Lets try this one combined with the other one. You will notice this LoRA is built very well and has many separate trigger words: 1748328455816.png

In this case, i want to keep the Teal Bikini. So I will include only the trigger words for the character and for her hair/ body, I will not include the trigger words for her clothing.

1748328502453.png

Make sure you remove "Hatsune Miku" from the prompt, since we are now prompting for a different character
1748328558030.png

And then lets give it a run:

1748328621370.png

Not bad, I have combined 2 LoRAs to create this image.


Important Notes About LoRAs

While LoRAs are great and are a big part of local AI generation, there are some things you may notice eventually:

  1. Not all LoRAs are "good". There are a lot of bad LoRAs which simply ruin your image or make it worse. If a LoRA is giving you a lot of trouble, there's a good chance that the LoRA itself is broken and can't be used.
  2. LoRAs can affect your image in multiple ways. Eg: If you add a LoRA to create a character from Pokemon, you may notice that the entire image also gets influenced to a "pokemon" style, even if it is not a style LoRA. This is an unfortunate result of LoRAs and can sometimes be helped by reducing the weight of the LoRA, but sometimes cannot be avoided.
  3. Adding too many LoRAs can ruin the image. "Less is more", if you add too many LoRAs, you will start to notice the quality of the image degrade and start looking "burned" or deep fried.
 
Last edited:

NoTraceOfLuck

Member
Game Developer
Apr 20, 2018
291
478
Gaining Even More Control

Ok so we can now inject new concepts into our image, which is great, but this still doesn't give us unlimited control.

Lets look at this image:

1748329136271.png


Tip: You can right-click, recall metadata, Use All to instantly set the editor back to the state it was in when you created that image. (Prompt, LoRAs, etc...)


1748329103529.png


This image looks good, but she seems a bit shy in this image. What if I want this exact image but with her smiling and excited? (Eg: I do NOT want to generate an entirely new image with her excited, but in a different pose. I want this exact image.)

Well, we can do that with...

Inpainting

Inpainting is a very powerful concept in AI art. It allows you to manually fix up all the AI jank that can occur in an image, and can allow you to manually draw and insert concepts into an image if you just cannot get the model itself to understand what you want.

In this case, I have a goal:

  • I want her to have sandals on her feet
  • I want her to be excited and happy

Let's see how we can achieve that...

First, right click the image, and select 'New Canvas From Image' and 'As Raster Layer'

1748329382733.png

Raster Layer: A "Raster Layer" means the layer is just raw pixels. Nothing fancy. It's like drawing an image in Microsoft paint. We will look at Control Layers soon.

After clicking that button, you will see the screen change a bit. Next, you will want to click up here:

1748329487327.png


You will see some new information, some of which may look confusing at first, but it will all be explained here:

1748329520607.png

For now, lets leave everything how it is, and look over at the canvas on the left. You will see a paintbrush icon. This is exactly what it looks like, it allows you to draw on the image with new colors. And at the top, you will see a color picker.

1748329605414.png

The first thing I want to do is try and add some pink sandals to her feet. So I will select pink from the color picker:

1748329682338.png

And now I will just draw some rough sandals on her feet:

1748329749895.png

Perfect!

Now, it's important to add to the prompt any new concepts we want to add. In this case, I am adding pink sandals. So I will add pink sandals to the prompt:

1748329798691.png

FInally, click here to switch to 'canvas mode' , this will make it so the new image doesnt automatically save, but is instead presented to us and then we can decide whether to save it or not:
1748329867372.png

It should be green like this:

1748329883669.png

And click Invoke!

And here's the result:
1748329944394.png


Looks great! Right?

WRONG!

You'll notice her swimsuit changed. and other parts of the image changed slightly as well. That is NOT what my goal was. I wanted the exact same image, with pink sandals.

So now we're going to introduce a new tool... "Inpaint Masks"

Inpaint Masks: Inpaint masks are areas in the image which you can designate as the only area in the image that should change. Without any inpaint mask, it is actually re-rendering the entire image. But if we use an inpaint mask, we can limit changes to specific areas only.


Inpaint Masks

First off, we do not want to save this image, so click the trash can icon
1748330150249.png


Now, in the top right, you'll notice invoke gives us one default inpaint mask:

1748330185957.png


Click on it, and now you can use the paintbrush tool to draw your mask:

1748330243072.png

Now this is the ONLY area of the image which will change.

So lets click Invoke again.

1748330310107.png

Perfect! The rest of the image is completely unchanged, but she now has pink sandals!

Click the checkmark to accept these new changes
1748330360500.png

Now you can disable the inpaint mask by clicking here
1748330404484.png


Advanced Inpainting

Now lets try and accomplish the 2nd object, I want her to be excited and happy.

We will use the same tools as before. First, put an inpaint mask on her face and add the words "happy, excited" to the prompt
1748330525246.png

And click 'Invoke'

and boom

1748330587019.png


That looks fine. But what if I want EVEN MORE CONTROL?

I don't want her mouth to be open, I just want it to be a closed-mouth smile. We can do that by drawing it in manually:

1748330703891.png

But when I try to invoke this...

1748330755121.png

It didn't work. It gave her pretty much the same open mouth as before.

Now, I could try and mess around with the prompt and add "closed mouth" in the positive prompt or "open mouth" in the negative prompt. But it likely still won't produce the exact smile that I want.

This is where a very important concept in inpainting comes into play...

Denoising Strength: Denoising strength measure what percentage of the image is converted back to "noise" before the model starts to re-draw the image. A denoising strength of 1 means everything in the image itself is forgotten. That pink smile I drew on? Completely destroyed, converted back to "nothingness." A denoise stength of 0 means nothing changes at all. A high denoise strength gives the model more freedom to make something up. A low denoise strength limits the amount of creativity the model gets.

1748330840156.png

We can do some testing with this to better understand the concept.

Conver her whole head in an inpaint mask, and set the denoising strength to 1
1748331049875.png

Also, make sure 'seed' is set to Random for the best demonstration:
1748331096962.png

Now, notice it completely changes the whole structure of the image. Her head is no longer tilted down, and her eyes are wide and eyebrows are raised.
1748331177516.png

But if you set the denoise lower, to around .5 the changes to the image are much less
1748331262915.png

Denoise Strength is a valuable tool in your toolbox and you will adjust it often. If you want the model to completely redo something, set it very high. If you just want it to redo small details or smooth something out, it can make sense to go as low as .3, often I start a .65 and see where it gets me before adjusting further.

Now... let's get back to that other image, I want this to draw just a flat, closed mouth:

1748330703891.png

So I'm going to set the denoise to a low .2

Still not perfect...

1748331430434.png


So lets get into the last concept here

The Bounding Box

The bounding box is the last very important concept in inpainting. Now, it's a bit confusing to explain. But to keep it simple: when you generate a 1024x1024 image, it applies that 1024x1024 resolution to the entire image.

However, if you reduce the bounding box to cover only a specific area of the image, it will take the entire 1024x1024 resolution and apply it only to that small area.

In short: Reducing the bounding box size can allow you to increase the quality and resolution of specific parts of your image

Click the bounding box button here:

1748331570197.png

Now drag the corners of the bounding box to cover only her mouth + a little bit of extra space
1748331610083.png

Now, it's important that your inpaint mask does not touch the edge of the box, or you will get artifacts in your image. So carefully draw an inpaint mask covering only her mouth

1748331670289.png

Now, the entire 1024x1024 resolution will be applied specifically to just her mouth, giving it much more detail and attention. Lets see how it goes.

Now, it looks much closer to what I had drawn, and you can see the extra resolution also added some extra detail like teeth and a tongue.

1748331828516.png
 
Last edited:

NoTraceOfLuck

Member
Game Developer
Apr 20, 2018
291
478
Maximum Control

Alright so this is great, we've learned:

  • How to create an image
  • How to inject style or character LoRAs into the image to change how it looks or teach new concepts to the model
  • How to draw on top of the image to manually insert details that you want

But there is one more challenge that can't be resolved with everything I've written about so far.

Let's look back again at this image:

1748332362917.png

This image looks great, but what if I decide that I like this exact pose, but I actually do not want her to be on the beach, and I don't want her in a bikini? Instead, I want her sitting outside in a grassy field, wearing a school uniform.

How might you solve this?

Well, if you're crazy, you could try inpainting all of this:

1748332684714.png

But the results arent great
1748332770972.png


And also it was a lot of work, and requires you, as the artist, to come up with all the colors and the design... surely there is a better way!


ControlNet

ControlNet is what separates the amateurs from the pros. ControlNet allows you to control the structure of an image, without adding colors or manually drawing things.

ControlNet requires a few extra models installed.

Go here:
1748332956975.png

Then click "Starter Models"

1748332991609.png

Then click the + sign next to the following models (make sure you select the 'SDXL' version)

  • Hard Edge Detection (canny)
  • Depth Map
1748333081489.png

You can also install the others ones if you want, though these are the only 2 I will cover in this tutorial.


Now back to our image
1748333136291.png

Right click the layer and select 'Copy Raster Layer To' and 'New Control Layer'
1748333188379.png


Now disable the raster layer by clicking here
1748333220561.png


Now click here
1748333257255.png

And Select "Hard Edge Detection Canny"

1748333289066.png

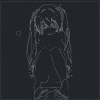
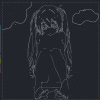
You'll notice something happen to our image
1748333313588.png


What is happening here:

This effectively applies an edge-detection filter to our image. Now, when we generate an image using this control, it will attempt to replicate all of these same 'edges' in the new image. Even if we completely change the prompt, the new image will have the same edges as this one.

Let's try it out.

First, click 'Apply' in the box in the bottom middle. Then, replace the prompt with this:

no lineart, flat color, masterpiece, best quality, highres, absurdres, hatsune miku, uniform, stockings, outdoors, grass, sunny, outdoors, sky, sitting, straight on, feet

And then click 'Invoke' and lets see what happens
1748333518815.png

Wow, look at that, it follows the edges of the original image almost exactly. Except now she's in a uniform and sitting in the grass.

But, this isn't really a "uniform". It still generated her with a top that resembled the old bikini top. It also generated an umbrella, and generated some strange shapes down where her hair was. Which makes sense, because if you look at the original control, all of these items were clearly marked in the image

1748333495161.png

What if I don't want the umbrella, or the bikini top, and I want it to completely redo how her hair is laying on the grass?

Well, it's simple...

With the control layer selected, you can click the 'eraser' tool
1748333670198.png

And now just... erase all the stuff that we don't want controlled. I erase the whole background, and the bikini shape, and most of her hair. Now, the model has complete freedom to generate whatever it wants in this areas:
1748333764810.png

And now, just for fun, let's draw our own little clouds in. To do this, select the paintbrush and set the color to white. Then simply draw in whatever you want.

1748333865360.png

And click Invoke

And here we go
1748333958286.png

It didnt draw my clouds in the way I expected, but overall it still looks good.


ControlNet Settings

1748334005920.png


You have a few settings on your ControlNet.

The first is weight. This is similar to LoRA weight. This is how strongly the ControlNet will be applied. At 1, it will be extremely strict following the edges, even if it is forced to make the image incoherent. It will prefer to generate a garbage, nonsense image, as long as it can guarantee that it is matching the control. At lower weights, it have more freedom to ignore the controlnet in exchange for producing a more coherent image

Begin/End %: This is the time at which the Controlnet is 'applied'. The usability here varies quite a bit, but generally if the ControlNet isn't playing how you want, you can adjust this.

Control Mode: I have tried the options here, and generally never leave Balanced mode.


ControlNet Caveats

One important thing to know about ControlNet is that it can severely degrade the quality of your image if the weight is too high. My general rule is "Keep the weight as low as possible to accomplish what I want." If I can get a good image that matches my expectations by having a weight of .2, I will generally prefer that. In general, I end up on a weight of 0.4 and find that is generally a good middleground.
 
Last edited:

NoTraceOfLuck

Member
Game Developer
Apr 20, 2018
291
478
Regional Guidance

Now let's address another common failing in AI art: controlling where specific objects show up.

Now, you may ask, isn't that what we just did with ControlNet? Well, technically no. While there is a good chance that the model will 'figure out' that the Miku-shaped edges are where Miku is supposed to go, technically there is no guarantee of that.

Additionally, there's another challenge which I haven't shown yet: generating 2 characters in the same image.

Let's try this prompt:

no lineart, flat color, masterpiece, best quality, highres, absurdres, hatsune miku, uniform, stockings, megumin, red dress, leggings, outdoors, grass, sunny, outdoors, sky, sitting, straight on, feet

With this, I have added both Megumin and Miku to the prompt. Let's see how it does:

1748335033170.png

Okay, it didn't put Miku in the image at all. However, this may be a skill issue. Remember, this model is based on Illustrious, which is prompted using Danbooru tags. Danbooru has a specific tag "2girls" which I don't have in my prompt.

Let's add '2girls' to the prompt and see what happens.

1748335175604.png

Okay that actually turned out great (this is why Illustrious is a popular model, it can do pretty well with 2 characters)... so let's make it harder. I am adding a 3rd character to the mix:

tracer, orange jumpsuit

1748335231425.png

There, now it looks terrible.

So, how can we fix this? Let's try this mysterious button we haven't tried yet:

1748335289244.png


We actually need to press it 3 times so that it looks like this:

1748335331766.png


Now, what did we just do?

Regional Guidance: Regional Guidance is quite simple. It allows you apply a prompt to a specific area in the image. Let's add the first one. Click '+ Prompt'

1748335388135.png


Now add one of the 3 characters to each prompt. Also include their clothing
1748335453956.png

Now, click on each layer, and the select the paint brush:

1748335488135.png

And you can now 'Draw' where you want that prompt to apply. I apply each one to their own distinct area:
1748335534678.png

Note it is important that your original prompt on the left still contains all of this information:
1748335625948.png

Now lets see what happens. It took a few tries, but turned out pretty good:
1748335761762.png

There is some reduction in quality here. An image with this sort of detail would be best generated at a higher resolution.
 
Last edited:

osanaiko

Engaged Member
Modder
Jul 4, 2017
3,012
5,787
Bravo NoTraceOfLuck

One of the best guides I have seen. Thank you for making and sharing it.

I've used the tools a lot, although not Invoke AI, and still learned something new - that "Pony is trained only with danbooru tags". In my usage of Pony (PonyDiffusionXLv6 to be exact) i have found that natural language phrases still work reasonably well, but i will try again with danbooru and see if that improved the "control-ability" of outputs.
 
Last edited:

NoTraceOfLuck

Member
Game Developer
Apr 20, 2018
291
478
Bravo NoTraceOfLuck

One of the best guides I have seen. Thank you for making and sharing it.

I've used the tools a lot, although not Invoke AI, and still learned something new - that "Pony is trained only with danbooru tags". In my usage of Pony (PonyDiffusionXLv6 to be exact) i have found that natural language phrases still work reasonably well, but i will try again with danbooru and see if that improved the "control-ability" of outputs.
I do think there is some limited amount of natural language understanding (or at least, the danbooru tags are so extensive that the model seems like it is understanding natural language), however danbooru will always be the most potent with Pony.

If you haven't tried an Illustrious based model, you may find better control than most Pony models offer. Pony really shines when used with Style and Character LoRAs, it seems to be very flexible at completely learning new concepts, but I find Illustrious is the king in terms of actually understanding what you're writing.
 

osanaiko

Engaged Member
Modder
Jul 4, 2017
3,012
5,787
Unfortunately as I am partway through making a game with a specific art style, I'm stuck with a Style LORA based on PonyXL.

But maybe a two-step process might work: initial gen of exactly what I want using illustrious, and then conversion to style via img2img with Pony+LORA.
 

andresblinky

Member
Jul 21, 2018
106
218
Thanks for this OP, Love this guide, made getting started very easy, I appreciate your hard work putting this together. good stuff
 

lossius

Newbie
May 7, 2023
68
52
It seemed like a really cool guide, but it's a shame that my PC is worse than a potato and it kept showing as "Disconnected" in the middle of a generation and on the Steam Deck it doesn't work at all :(
 

plaseholderacc

New Member
Sep 4, 2020
4
1
Wow, thanks for this guide, it's great. I've been experimenting with generating images and videos using comfyui, but from reading your guide, most of these concepts apply across whatever frontend you use. I also use that exact model, , with a bunch of loras - It's really quite good. I've gotten to the point where I'm generating stuff I like, but not able to get consistency across character clothing or backgrounds - inpainting and controlnets seem like the next step of what I'm looking for to get consistency - Invoke def seems a lot easier to use for these purposes, so I'll give it a try.
 
  • Like
Reactions: andresblinky

Midzay

Member
Game Developer
Oct 20, 2021
269
657
Dude, that's awesome. Will put the link here on my beginner developer site. Let me know if you open a copy of the article in the public domain. I'll amend the URL.
 
Last edited:

tlac

Newbie
Sep 11, 2022
20
42
Very good tutorial. I've already been making some AI pictures online. I discovered some of these concepts by looking at other's prompt. Now I have a much better understanding. Thank you
 

wal01

New Member
Jan 24, 2019
6
5
Thats just awesome, thank you!

Used local webUI a lot, but it feels a bit outdated now. This guide is a good opportunity to upgrade my AI station

Can ou please include a part in Guide about saving character consistency while changing a pose or angle? For example I want the same character from_side or from_above or dancing/sitting/lying/having sex. How can I learn such power?
 

osanaiko

Engaged Member
Modder
Jul 4, 2017
3,012
5,787
Can ou please include a part in Guide about saving character consistency while changing a pose or angle? For example I want the same character from_side or from_above or dancing/sitting/lying/having sex. How can I learn such power?
I've been working on my game project for 12 months now and I don't know how to do this reliably. If you work it out please share :LOL::cry:
 
5.00 star(s) 1 Vote