- Apr 14, 2018
- 610
- 864
Hey guys, So I've seen a lot of creators post about how they either have to put projects on hold, or abandon them because their computer is just to underpowered to render, likewise, I've seen a lot of people comment about how they would like to do renders, but their computer isn't strong enough & they think that they need a high end gaming rig, or high powered CAD workstation with a beefy processor, tons of RAM & a top of the line GPU.
Well for starters, that's a myth. You don't NEED a high end Computer. I'm a game creator myself & I do most of my work on a 5th gen i7 thinkpad, with 32 GB of DDR 3 ram & an out of date, (So out of date that DAZ doesn't even use it), Nvidia Quatro chipset with only 2 GB of GPU RAM. Now for many, you might be thinking "Hey, that's better than my PC", Well I also have a Dell Latitude E5450 with a 5th Gen i7, 16 GB of Ram, a 2 GB out of date GTX GPU, a Dell latitude E7250 with a 6th gen i7, 16 GB of Ram & plain ol intel HD Graphics, (i.e. No GPU) & a older Lenovo Thinkpad with a 4th gen i7, 16 GB of ram & only intel HD graphics, & all of these computers can run DAZ & Render in good quality in iRay without any problem. Now granted, yes they all have a lot of Ram & i7 processors, but all of them are at least 5 or 6 years old, half of them don't have a GPU & the ones that do, the GPU is too old & outdated anyway, so DAZ doesn't even use it. Most of these creators, Lookin at you Gambino games, that say their rig is too weak to render have rigs way beefier than all of mine combined.
"But my computer is older & even more underpowered" you might say. Well I also have about 4 or 5 laptops from the 1st gen through ivy bridge, (3rd gen) i7 & even some i3 processors, no GPU & only 4 to 12 GB of RAM. These are complete potato computers even by current era standards. If that sounds like your PC, YES, you too can actually still do 3d renders. This post is for you.
Now DAZ doesn't need a lot of resources to just run & build a scene, most of the resource demand comes from rendering images & animations. Blender, however can do some pretty nice renders too & can work with much much lower resources & render much faster. The only problem with it is, there aren't a whole lot of assets out there to use with Blender, most of the stuff used has to be made from scratch from a gray block of clay, Posing in Blender is a pain with all those bones & rigging & it's just not as user friendly. Well the idea, my friend. Is to build the scene in DAZ & then export it to blender to do the render. So here's how you do that.
I won't get into the weeds on how to use Blender, with areas such as setting lighting, the camera & such, There's loads of turtorials out there for that, I will say this, learn the hotkeys. The camera alone was a nightmare until I learned to use the hotkeys, then it was a breeze.
I'll instead focus on the issues more specific to how to get the scene from DAZ to blender, & how to fix it so it's usable there. First, Don't waste time with the Daz to Blender Bridge or diffeomorphic importer. they are totally useless. If you just want to import 1 single character or model to blender, they are fine for that. otherwise, they are trash. & Before anyone says "Nu uh, you can import whole scenes with dem", I spent weeks scouring the internet looking for ANYTHING on how to do it with those tools & it was nowhere to be found. So even if the ability to is techincally there, Where's the directions? Nowhere? or at least nowhere that's clearly articulated? Yeah. Point proven. Like I said. Completely useless.
So , This is what you do.
Step 1, Build the scene in DAZ. Basically get the scene in DAZ all put together exactly how you want it when you're ready to render. Don't worry about setting lighting though because it doesn't transfer over, so unless you're able to render in DAZ, save the wasted time & energy. Then select EVERYTHING in the scene, (click the item at the top of the list, then scroll to the bottom, shift + click the last item, should select everything in the scene). then go to file, export, save it as an .obj. When you're exporting it, 2 things to be aware of. In DAZ, the Y axis is up, but in Blender, the Z axis is up. So make sure when in the export settings, you set the Z axis as vertical, (you can select this in Blender's import settings too, selecting Y as the vertical), & make sure you tick the boxes for write surfaces, write material library & quote paths containing spaces. Otherwise, you'll end up with blank, white statues of everything with no textures. Now to see them in blender, there's 4 circle icons in the upper right of blender. The 3rd & 4th ones are going to be the ones where all your textures will be visible, the 4th one being the rendering view. The defaults for everything else should be fine.
Step 2: Import the .obj file of the scene into blender, (file, import, route to where the file is in blender), Now if everything went well, you should be seeing an all white, backwards version version of your scene. Like I said, click on the third of the 4 balls in the top right of blender, now it should just look like your scene, only backwards & all white eyes on the models.
Step 3. Ok so from here, first to resolve the eyes. You need to select each character one at a time & go under material properties. It looks like a red Globe. on the right hand menu options. That's the one, (At least for blender 3.1, which is what I'm using. you might have to google fu if you're using a different version). once under there, you'll have to select eye moisture, cornea, possibly iris & pupil, & with each one, set alpha to 0, & under viewport display, set blend mode to alpha hashed. Go down the list of those 4 items until their eyes look normal.
Step 4. Ok so the eyes are fixed, but the scene is still backwards. Well, if you're rendering the whole project in blender, Just build the scene backwards in DAZ, otherwise, in Blender, just hit tab to go into edit mode, then select meshes at the top, mirror & mirror along X axis. Now all the pieces should be where they belong.
Step 5. Now, the next issue is lighting. This part took me 2 days to figure out. As it is, if you try to add in lights, it will be a mess because all the normals are inverted & I couldn't figure out how to correct it. If you put a light in the top left, it will behave like it's coming from bottom right, it will essentially make everything look photo negative & it will leave black marks on anything it reflects off of rather than light spots. In short, it will turn your render into a deep fried meme. Here's how to fix that. On the options on the right, there's the Object data properties. It looks like an upside down triangle with dots on the points. You might have to hit tab & go into edit mode to see it. You need to select the first item in your scene, then go under the object data properties & scroll down to the option of clear custom split normals. Then repeat that process for every item in the scene one at a time. I tried doing it for all of them, no luck. So you have to do it individually for every listed item in the scene.
Step 5. Once all that is done, you should be left with essentially a mirror of your DAZ scene, minus camera & lighting. There's tons of tutorials that should work fine now on how to do cameras & lighting in Blender, So I'll leave that to them, I will say this though, get familiar with the hot keys. for example, if you have a floor lamp in the scene like I do, press shift & right click on the lampshade to set the 3d curser there, then press shift + A to get the menu to add a light. Puts it almost right where you want it to go, so you don't have to do a lot of moving. With the camera, when it's selected, G selects it to move just by moving the mouse curser & left click sets it, g then z adjusts the vert axis, g & then z 2 times adjusts the linear, etc.. There's also a hotkey for making the camera view the full viewport, something with the home button, but I can't remember.
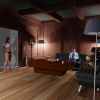
Following these steps though, you should be able to fairly quickly & easily build your scenes in DAZ, then move them to Blender & render them, even on a potato computer. Here's a iray render I did of a scene I made, then the same scene in 2 renders in blender, an eevee engine render & a cycles engine render.
I hope this helps some of you out there. I did the days of suffering, frustration & work & then left this here so that you don't have to go through the same nightmare.
The DAZ Iray scene

The Eevee engine Blender version
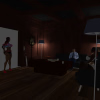
& the Blender cycles engine version
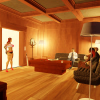
All 3, I believe, came out better than 3delight or openGL renders in DAZ, in some ways, even better than the iRay render.
Well for starters, that's a myth. You don't NEED a high end Computer. I'm a game creator myself & I do most of my work on a 5th gen i7 thinkpad, with 32 GB of DDR 3 ram & an out of date, (So out of date that DAZ doesn't even use it), Nvidia Quatro chipset with only 2 GB of GPU RAM. Now for many, you might be thinking "Hey, that's better than my PC", Well I also have a Dell Latitude E5450 with a 5th Gen i7, 16 GB of Ram, a 2 GB out of date GTX GPU, a Dell latitude E7250 with a 6th gen i7, 16 GB of Ram & plain ol intel HD Graphics, (i.e. No GPU) & a older Lenovo Thinkpad with a 4th gen i7, 16 GB of ram & only intel HD graphics, & all of these computers can run DAZ & Render in good quality in iRay without any problem. Now granted, yes they all have a lot of Ram & i7 processors, but all of them are at least 5 or 6 years old, half of them don't have a GPU & the ones that do, the GPU is too old & outdated anyway, so DAZ doesn't even use it. Most of these creators, Lookin at you Gambino games, that say their rig is too weak to render have rigs way beefier than all of mine combined.
"But my computer is older & even more underpowered" you might say. Well I also have about 4 or 5 laptops from the 1st gen through ivy bridge, (3rd gen) i7 & even some i3 processors, no GPU & only 4 to 12 GB of RAM. These are complete potato computers even by current era standards. If that sounds like your PC, YES, you too can actually still do 3d renders. This post is for you.
Now DAZ doesn't need a lot of resources to just run & build a scene, most of the resource demand comes from rendering images & animations. Blender, however can do some pretty nice renders too & can work with much much lower resources & render much faster. The only problem with it is, there aren't a whole lot of assets out there to use with Blender, most of the stuff used has to be made from scratch from a gray block of clay, Posing in Blender is a pain with all those bones & rigging & it's just not as user friendly. Well the idea, my friend. Is to build the scene in DAZ & then export it to blender to do the render. So here's how you do that.
I won't get into the weeds on how to use Blender, with areas such as setting lighting, the camera & such, There's loads of turtorials out there for that, I will say this, learn the hotkeys. The camera alone was a nightmare until I learned to use the hotkeys, then it was a breeze.
I'll instead focus on the issues more specific to how to get the scene from DAZ to blender, & how to fix it so it's usable there. First, Don't waste time with the Daz to Blender Bridge or diffeomorphic importer. they are totally useless. If you just want to import 1 single character or model to blender, they are fine for that. otherwise, they are trash. & Before anyone says "Nu uh, you can import whole scenes with dem", I spent weeks scouring the internet looking for ANYTHING on how to do it with those tools & it was nowhere to be found. So even if the ability to is techincally there, Where's the directions? Nowhere? or at least nowhere that's clearly articulated? Yeah. Point proven. Like I said. Completely useless.
So , This is what you do.
Step 1, Build the scene in DAZ. Basically get the scene in DAZ all put together exactly how you want it when you're ready to render. Don't worry about setting lighting though because it doesn't transfer over, so unless you're able to render in DAZ, save the wasted time & energy. Then select EVERYTHING in the scene, (click the item at the top of the list, then scroll to the bottom, shift + click the last item, should select everything in the scene). then go to file, export, save it as an .obj. When you're exporting it, 2 things to be aware of. In DAZ, the Y axis is up, but in Blender, the Z axis is up. So make sure when in the export settings, you set the Z axis as vertical, (you can select this in Blender's import settings too, selecting Y as the vertical), & make sure you tick the boxes for write surfaces, write material library & quote paths containing spaces. Otherwise, you'll end up with blank, white statues of everything with no textures. Now to see them in blender, there's 4 circle icons in the upper right of blender. The 3rd & 4th ones are going to be the ones where all your textures will be visible, the 4th one being the rendering view. The defaults for everything else should be fine.
Step 2: Import the .obj file of the scene into blender, (file, import, route to where the file is in blender), Now if everything went well, you should be seeing an all white, backwards version version of your scene. Like I said, click on the third of the 4 balls in the top right of blender, now it should just look like your scene, only backwards & all white eyes on the models.
Step 3. Ok so from here, first to resolve the eyes. You need to select each character one at a time & go under material properties. It looks like a red Globe. on the right hand menu options. That's the one, (At least for blender 3.1, which is what I'm using. you might have to google fu if you're using a different version). once under there, you'll have to select eye moisture, cornea, possibly iris & pupil, & with each one, set alpha to 0, & under viewport display, set blend mode to alpha hashed. Go down the list of those 4 items until their eyes look normal.
Step 4. Ok so the eyes are fixed, but the scene is still backwards. Well, if you're rendering the whole project in blender, Just build the scene backwards in DAZ, otherwise, in Blender, just hit tab to go into edit mode, then select meshes at the top, mirror & mirror along X axis. Now all the pieces should be where they belong.
Step 5. Now, the next issue is lighting. This part took me 2 days to figure out. As it is, if you try to add in lights, it will be a mess because all the normals are inverted & I couldn't figure out how to correct it. If you put a light in the top left, it will behave like it's coming from bottom right, it will essentially make everything look photo negative & it will leave black marks on anything it reflects off of rather than light spots. In short, it will turn your render into a deep fried meme. Here's how to fix that. On the options on the right, there's the Object data properties. It looks like an upside down triangle with dots on the points. You might have to hit tab & go into edit mode to see it. You need to select the first item in your scene, then go under the object data properties & scroll down to the option of clear custom split normals. Then repeat that process for every item in the scene one at a time. I tried doing it for all of them, no luck. So you have to do it individually for every listed item in the scene.
Step 5. Once all that is done, you should be left with essentially a mirror of your DAZ scene, minus camera & lighting. There's tons of tutorials that should work fine now on how to do cameras & lighting in Blender, So I'll leave that to them, I will say this though, get familiar with the hot keys. for example, if you have a floor lamp in the scene like I do, press shift & right click on the lampshade to set the 3d curser there, then press shift + A to get the menu to add a light. Puts it almost right where you want it to go, so you don't have to do a lot of moving. With the camera, when it's selected, G selects it to move just by moving the mouse curser & left click sets it, g then z adjusts the vert axis, g & then z 2 times adjusts the linear, etc.. There's also a hotkey for making the camera view the full viewport, something with the home button, but I can't remember.
Following these steps though, you should be able to fairly quickly & easily build your scenes in DAZ, then move them to Blender & render them, even on a potato computer. Here's a iray render I did of a scene I made, then the same scene in 2 renders in blender, an eevee engine render & a cycles engine render.
I hope this helps some of you out there. I did the days of suffering, frustration & work & then left this here so that you don't have to go through the same nightmare.
The DAZ Iray scene

The Eevee engine Blender version

& the Blender cycles engine version

All 3, I believe, came out better than 3delight or openGL renders in DAZ, in some ways, even better than the iRay render.

