Tutorial [DAZSTUDIO] How to speed up rendering times with 3Delight

IZnoGouD

Newbie
Dec 22, 2016
60
53
HOW TO SPEED UP RENDERING TIMES (OR IMPROVE QUALITY) WITH 3DELIGHT IN DAZ STUDIO
DISCLAIMER: This guide is not of my autory and, as such, I'm not fit to answer any question. You can visit the original guide .


It’s easy to reduce rendering times in DAZ Studio with 3Delight at the expense of quality. Likewise, it’s possible to greatly improve the rendering quality with the same setting: the secret lies in the Shading Rate Slider.

On the Render Tab, under Render Settings, take a look at a lone slider called Shading Rate. The default is 1 and it produces a good compromise between speed and quality.
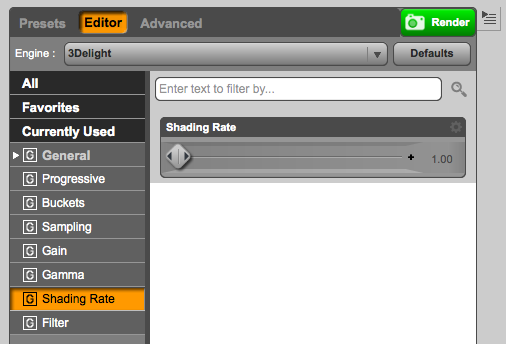

The higher the Shading Rate is set, the lower the quality of the image is – but at the same time, render times speed up. This is great to get an impression of the overall scene without having to wait ages.

Conversely, the lower the Shading Rate is set, the higher the render quality is as a result – which increases render times, but gives a very nice quality boost. It’s easy to overlook this setting!

Here are some example renders. Click on the images to see the full resolution at 1920×1080. No postwork was applied. The scene is Stonemason’s Tin Pan Alley with the Genesis Troll.

Shading Rate 1 (Default) – Render Time: 1 minute
The default setting gives a good compromise between quality and speed. I always wondered how to make such a render look better.

Shading Rate 10 – Render Time: 30 seconds
Notice how the quality of all textures is reduced for a big speed increase. Anything over 10 will make the render even faster, but there soon comes the point at which you won’t recognise your image anymore.

Shading Rate 0.1 – Render Time: 10 minutes
Compared to the default Shading Rate of 1, this setting produces slightly better results. This is probably not the best example, but detail in the background shows up better (had I not chosen that camera effect). However, the image takes ten times as long to render – and it’s not a very complex scene. Is the quality really worth the tenfold increase in render time?

Open all three images in their full resolution in separate tabs and see for yourself.

If you’ve never played with the Shading Rate in DAZ Studio, you’ll be in for a surprise: now you can create either faster renders without trimming the objects in your scene, or create higher quality results – all thanks to a single setting.


SOURCE:
 

Haexoi

Newbie
Apr 12, 2017
69
137
I have yet to see a major difference in quality between a setting of 1 on the shader rate and a setting of .1. But because in theory it's "better" - I always use .1 for my "final render". Other settings to keep an eye on are sample rate x and y. "4" is good for draft renders while "12" is about the highest you'll ever want or need. This does have a noticeable impact on both quality and render times. The tradeoff between quality and time though is worth it. If you bump it up to say "16", you begin to get diminishing returns(almost no noticeable difference in quality, but much greater render time). The shadow samples too is important. Again "4" is okay for draft renders. But your final should be at "32". You can go higher, but you will again not see much improvement in quality at the cost of much greater rendering time.

After running many renders, I'm thinking of lowering my "final render" settings to 8, 8(sample rate x and y) and 16 for shadow samples and a shading rate of .5 or 1. I'll have to do some quick tests(same scene/lighting with different render settings). But after doing some "draft" renders and finding the quality "not terrible" - I'm lead to believe my current "final render" settings are "unnecessarily high". If I can crank out a final hd image in 20-40 minutes as opposed to 60-120, that would be great!

Final note on render times is this. Some hairs take far longer to calculate than others. Same is true for some skins. Complexity of lighting in the scene has a major impact. Some lights are designed to be able to ignore certain surfaces for speed, so you can make "hair invisible" to a certain light source that is calculating shadows, but "visible" to another light source that is only providing ambient light (no shadow calculation making it quicker). The uberenvironment lights have their own "quality settings" that like the render settings discussed above, can have a huge impact on both quality and render times. An uberenvironment light set to hiquality takes much longer than "mid or lo". If set to "indirect lighting" it will take longer than "occlusion" or "ambient only". If set to "GI" you're definitely going to want other lights as it works best as a supplement to traditional lighting, however - it has a huge impact on render times.

The very last thing I should mention is raytrace depth. This is primarily used for reflections. With a raytrace depth of "1", you should see a reflection on a reflective surface, but you would not see a reflection within a reflection on a second reflective surface. With a raytrace depth of 2, you would see this secondary reflection within the reflection, but not the "third reflection within the reflections" and so on. While it's mostly important for reflections, it does have a small impact on lighting up areas that are not being hit by a direct light source. So if you had a glowing orb on one side of a wall with spaces around it, very little light would get to the other side of the wall with a low raytrace count. If the value is increased, you can see the other side of the wall get's more illuminated by how the light bounces off the surrounding surfaces. In most scenes, you will see very little difference between a setting of 1, 2 or even 3. What you will see is vastly increased render times. So I recommend leaving it at the default "2"(or even 1) unless you absolutely need more.
 
  • Like
Reactions: Illumination

Haexoi

Newbie
Apr 12, 2017
69
137
No, IZnougoud is having permissions issues, can't edit his own thread, don't worry ;)
I have the same issue with earlier posts in the thread I started on test renders. Newer posts work fine.
 

Bloo

The Angry Person
Former Staff
Aug 18, 2016
2,972
30,279
I have the same issue with earlier posts in the thread I started on test renders. Newer posts work fine.
It's same permissions, if he fixes Iz he fixes yours, don't worry :p
 

JKnight

Newbie
Aug 15, 2016
51
33
The OP is mainly about shading rate. 3Delight is a REYES renderer and is really good at anti-aliasing edges of polygons (amongst other things like subdivision and displacement). Shading rate is the amount of samples inside the polygon and is most obvious when looking at something with a bump map and specular reflection. If your shading rate is too high you will get specular aliasing.
 

King of Lust

Member
Game Developer
May 10, 2017
296
942
i am going to buy a new laptop for fast rendering can anyone suggest me the configuration that is needed for fast rendering. i am thinking about buying i7 7700HQ WITH 16GB RAM AND NVIDIA GTX 1050 4GB graphics card. is this confiq is okk?????
 

BuriedRabbit

Newbie
Game Developer
Mar 11, 2018
27
6
To use a fast rendering, you must control the lights, as less lights required, faster renders.

By controlling the materials, using the layers only what you need, renders may get faster.
 

infinitemonkey

New Member
Dec 17, 2018
1
1
3delight have ditch REYES rendering for years. Ever since 3delight 11/12, it has a very fast path tracer. The new path tracer is comparable to Renderman RIS or Arnold. This makes shading rate obsolete and pretty much ignored. Unfortunately, DAZ is way out of step with the renderer. Something like four years behind in builds.

If you want to make use of 3delight full potential in DAZ Studio, take a look at this:


It's a modern shader that just spanks silly older shaders, with both running on the 'old' 3delight renderer.
 
  • Like
Reactions: p_staker