I will help you improve your daz renders!

Aug 2, 2017
75
311
I've been working with daz for a while now, about two years, and I feel like I've gotten to the point that I understand the software very well and understand the aspects of making great renders. I would like to share some of my experience with you guys and help out by critiquing and teaching you ways to improve your renders. Just post your renders below and i'll gladly help you out!
 
Aug 2, 2017
75
311
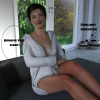
View attachment 366064

here's one i do in my free time. thx
There is a lot to fix here, so i'll start with lighting

fix_1.png

1. Remove the light source on the left creating the bright spot on the wall
2. I'm assuming there's a window on the right so add a spotlight outside of it looking into the room to brighten up the natural light direction. Make sure the light geometry is set to sphere or rectangle
3. Add a light source like a spotlight/ghost light above her but not directly above to act as more of a ceiling light.

This is how you would setup your spotlight by the window
1565197445873.png
1565197469879.png

Here is a the difference of having an additional light source by the window has. I removed all lights from the scene other than the spotlight by the window and the hdri.

1565197781224.png

This is the room without the light

1565197974979.png

I set my light to 2mil lumens for the example but you will have to play around with it for each environment.

Next you want to add a light for your character, but it needs to blend well with the scene and not create bright spots like you had in your render. Add a spot light or a point light above the girl slightly to the left of her since you already have light from the window hitting the right side.

This is how close I set my point light to my character

1565198870351.png
1565199091553.png

This is the lighting you would get without any environment lights like lamps, ceiling lights, etc. now add in your regular environment lights, so in my case i would just make the ceiling lights emissive again

This is what it looks light with all the lighting put together

1565199376078.png

She's well lit all around yet still slightly brighter on the right to show where the sunlight is coming in.

A final touch I would put on this example render is depth of field. It makes your characters pop out of the scene and blurs the background. When it comes to DoF, the lower your f/stop is, the more blurred the render is. I tend to go for a 15,16 f/stop value.

This is the final product with all the lighting and DoF (Ignore the pose clipping)

1565199831109.png


Next I want to mention the characters pose and expression.

There are a ton of great pose and expression sets that you can find on here, because your character is asian and im sure the base character is asian, I would look up the character name and see if there are specific poses for that character. Regular g8 poses and expressions will work on her if shes genesis 8 but since her facial structure is different from most g8 females, the expressions may come out a little weird and distorted.

At the moment, she looks like she's a balloon just gently resting on the surface of the couch. the way shes sitting without her legs or her back resting on the couch would put a lot more pressure where she's sitting since all the pressure is on a small point, you can make it look more natural with more of her touching the couch, like have her legs resting on it, or have her leaning back a little bit on the back cushions. You can also get squish morphs for her glutes which will make it look like shes actually sitting on it.

She also has no shadow on the couch which makes her stand out more, but once you add in better lighting that should be fixed.

The main thing is to fix the lighting and posing and it should be fine, but if you want to take it a step further than I would suggest replacing the couch material with a leather shader or a fabric shader because at the moment it doesnt look very realistic, it looks very meh and stands out in the render. It needs some sort of physical texture like a rough fabric or a glossy leather.


Aside from that, you could add some plants in the pots at the back to create some color contrast inside the room, and maybe add a little more gloss to the floor if it looks a little too bland with the new lighting.

One more thing that just popped into my head is addressing her shirt, the nipples poking through a little is a nice touch but the shirt fabric makes it look very sharp, go into the shirt parameters and turn the smoothing iterations up a bit and it will smoothe the fabric around the nipples making the cloth look like its resting more naturally

You can see the setting on the bottom right like in my screenshot

1565200879969.png
 

smaximus

Newbie
May 23, 2017
19
9
There is a lot to fix here, so i'll start with lighting

View attachment 366086

1. Remove the light source on the left creating the bright spot on the wall
2. I'm assuming there's a window on the right so add a spotlight outside of it looking into the room to brighten up the natural light direction. Make sure the light geometry is set to sphere or rectangle
3. Add a light source like a spotlight/ghost light above her but not directly above to act as more of a ceiling light.

This is how you would setup your spotlight by the window
View attachment 366092
View attachment 366093

Here is a the difference of having an additional light source by the window has. I removed all lights from the scene other than the spotlight by the window and the hdri.

View attachment 366097

This is the room without the light

View attachment 366099

I set my light to 2mil lumens for the example but you will have to play around with it for each environment.

Next you want to add a light for your character, but it needs to blend well with the scene and not create bright spots like you had in your render. Add a spot light or a point light above the girl slightly to the left of her since you already have light from the window hitting the right side.

This is how close I set my point light to my character

View attachment 366124
View attachment 366129

This is the lighting you would get without any environment lights like lamps, ceiling lights, etc. now add in your regular environment lights, so in my case i would just make the ceiling lights emissive again

This is what it looks light with all the lighting put together

View attachment 366137

She's well lit all around yet still slightly brighter on the right to show where the sunlight is coming in.

A final touch I would put on this example render is depth of field. It makes your characters pop out of the scene and blurs the background. When it comes to DoF, the lower your f/stop is, the more blurred the render is. I tend to go for a 15,16 f/stop value.

This is the final product with all the lighting and DoF (Ignore the pose clipping)

View attachment 366142


Next I want to mention the characters pose and expression.

There are a ton of great pose and expression sets that you can find on here, because your character is asian and im sure the base character is asian, I would look up the character name and see if there are specific poses for that character. Regular g8 poses and expressions will work on her if shes genesis 8 but since her facial structure is different from most g8 females, the expressions may come out a little weird and distorted.

At the moment, she looks like she's a balloon just gently resting on the surface of the couch. the way shes sitting without her legs or her back resting on the couch would put a lot more pressure where she's sitting since all the pressure is on a small point, you can make it look more natural with more of her touching the couch, like have her legs resting on it, or have her leaning back a little bit on the back cushions. You can also get squish morphs for her glutes which will make it look like shes actually sitting on it.

She also has no shadow on the couch which makes her stand out more, but once you add in better lighting that should be fixed.

The main thing is to fix the lighting and posing and it should be fine, but if you want to take it a step further than I would suggest replacing the couch material with a leather shader or a fabric shader because at the moment it doesnt look very realistic, it looks very meh and stands out in the render. It needs some sort of physical texture like a rough fabric or a glossy leather.


Aside from that, you could add some plants in the pots at the back to create some color contrast inside the room, and maybe add a little more gloss to the floor if it looks a little too bland with the new lighting.

One more thing that just popped into my head is addressing her shirt, the nipples poking through a little is a nice touch but the shirt fabric makes it look very sharp, go into the shirt parameters and turn the smoothing iterations up a bit and it will smoothe the fabric around the nipples making the cloth look like its resting more naturally

You can see the setting on the bottom right like in my screenshot

View attachment 366156
Wow...such a detail review and suggestion..you're awesome..i'll try your suggestion and repost the result later..thx a lot.
 
  • Like
Reactions: MrJago

PJWhoopie

Member
May 14, 2019
356
704
i'll try your suggestion and repost the result later..thx a lot.
Please do this smaximus!
I would love to see your results. You are already miles ahead of me... so this is a great learning process for me as well!!!
 

Joraell

Betrayed
Donor
Game Developer
Jul 4, 2017
2,450
8,723
I've been working with daz for a while now, about two years, and I feel like I've gotten to the point that I understand the software very well and understand the aspects of making great renders. I would like to share some of my experience with you guys and help out by critiquing and teaching you ways to improve your renders. Just post your renders below and i'll gladly help you out!
That's pretty nice gesture from you. BIG THUMB UP.
 

Nottravis

Sci-fi Smutress
Donor
Game Developer
Jun 3, 2017
5,132
27,262
I've been working with daz for a while now, about two years, and I feel like I've gotten to the point that I understand the software very well and understand the aspects of making great renders. I would like to share some of my experience with you guys and help out by critiquing and teaching you ways to improve your renders. Just post your renders below and i'll gladly help you out!
This is a totally aces thing for you to have done. Utter utter Kudos.
 

Huitieme

Scholarrior
Donor
Game Developer
Oct 9, 2018
3,108
15,703
monitoring.png

Great initiative, MrJago, and greater advice still! I feel like I'm already better just by reading your post.
Can't wait to try it on my own renders :)
 
Aug 2, 2017
75
311
View attachment 367861

I've tried the suggestion on lighting and this is the result. I'm impressed..this is definitely better than the previous one. Thx a lot.
You're getting there, try turning down the window light a tad bit so its not completely washing out details in the brighter spots. You can also brighten up your actual character light. You can also move your character light more in front of her if you want to render in this angle because the sunlight portion is acting more like a rim light and just highlighting her from this angle. If you move the light more centered in front of her but still above then the lighting on her will be a little more even.

The face is definitely better! since you have this camera angle blocking where she is sitting, you can actually clip her through the couch a little bit to make it look like shes sunken in a bit, since the camera wont see it, it will look natural.

A good improvement all around compared to the last render :)

I would still suggest replacing the couch material with a leather shader, it will make it look a little more realistic and also reflect some light back onto your character.
 

smaximus

Newbie
May 23, 2017
19
9
You're getting there, try turning down the window light a tad bit so its not completely washing out details in the brighter spots. You can also brighten up your actual character light. You can also move your character light more in front of her if you want to render in this angle because the sunlight portion is acting more like a rim light and just highlighting her from this angle. If you move the light more centered in front of her but still above then the lighting on her will be a little more even.

The face is definitely better! since you have this camera angle blocking where she is sitting, you can actually clip her through the couch a little bit to make it look like shes sunken in a bit, since the camera wont see it, it will look natural.

A good improvement all around compared to the last render :)

I would still suggest replacing the couch material with a leather shader, it will make it look a little more realistic and also reflect some light back onto your character.
Wow2.jpg

sunlight toned down
light centered
couch material changed..using different one than the one u suggested though..
 
  • Like
Reactions: MrJago

PJWhoopie

Member
May 14, 2019
356
704
Looking good!

The lighting is really making her pop and bringing out the details in a natural way.
 

ice2019

Newbie
Aug 5, 2019
25
21
Great thread with great information!
even i can learn something here :)

setting up lights is the hardest part for good renderers
 

ice2019

Newbie
Aug 5, 2019
25
21
Hey. How to make soft shadows like a Icstor. More lights?
bigger mesh lights creates more soft shadows
usually a size of 100 is great for soft shadows.
set width and height to 10 and you will get really hard shadows.
 
Last edited:
  • Like
Reactions: kakulbka

kakulbka

Newbie
Jan 10, 2018
42
111
bigger mesh lights creates more soft shadows
usually a size of 100 is great for soft shadows.
set width and height to 10 and you will get really hard shadows.
thanks, i found the instruction
if anyone needs :

Mesh Lights
Mesh lights are extremely useful for lighting an Iray scene because it provides soft and more realistic shadows. One of the best ways to get a mesh light in Iray, is to convert a spotlight into a mesh light. We can easily do this by –
  1. Select our spotlight and click on the parameters tab.
  2. Click on Light > Area.
  3. Set the Light Geometry drop-down menu to Rectangle, and set the height and width parameters according to the mesh light size that you want. A larger mesh light will product softer shadows, and a smaller mesh light will produce harder shadows.

How to change a spotlight into a mesh-light.
And that is it! Our spotlight has now become a mesh light, and the really cool advantage is that we can still change our camera to the spotlight view, and see exactly what it lights. Similarly, we can change a point light into a sphere, so that it produces softer shadows.
I usually use an IBL to provide ambient light in my scene, and multiple mesh-lights to further accent my figure(s). In the scene below, I only used two mesh-lights.
 

ice2019

Newbie
Aug 5, 2019
25
21
this?
no you can easily create an mesh light yourself
Make a new Spot light
Set Height and Width to 100
Set light Geometry to Rectangle

Then you have a light with really soft shadows

and dont forget to set "render emitter" to OFF
otherwise the light rectangle will be visible in the renderers

Edit: it seems that you where faster ;)

and if you dont know it
press CTRL L to see how the new spotlight will look like

one more tip: SHIFT CTRL A to make the camera follow the selected object when panning or zooming
CTRL Z to undo the last change

And one more: G8F skin is way too dark (almost cartoonish looking) so its difficult to light up the models properly
to fix this
select the model
go to the surfaces tab
select skin
reduce "Translucency weight" from the usual default at 0.50 to around 0.20 or lower (but not 0)
you also need to reduce TW to 0.20 for lips/nails/mounth/eyes

so instead of adding more lights to try to lit up the model make the skin lighter.
benefit with this is that the model will also blend into the enviroment better than before.

Translucency Weight for the G8F model reduced in this renderer
Intensity.png
 
Last edited: