Well there's your mistake; The vast majority of DAZ skin textures don't have SSS textures. They don't use SSS at all, or the effect is baked in the diffuse, or they for some weird reason just use a roughness map or something for it.
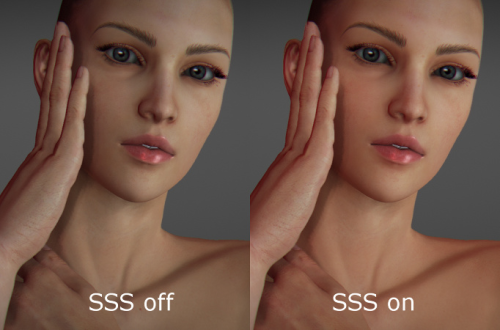
SSS is the effect of light scattering in thin parts of the skin, and coming out at the other side of that part. It gives the skin a slight translucent effect. In most cases this is extremely subtle and yeah is mostly notable when its off. It only becomes really noticeable if the man light comes from the back, in for example a dark room with lightning coming through a window. You can actually test this yourself by grabbing a flashlight and putting it under your hand. It should gives your fingers a reddish translucent effect.
This is a very over exaggerated example of the effect:
View attachment 1899056
SSS isn't supposed to be everywhere. The SSS slider in blender seems to do it everywhere while sorta looking for thickness, but it isn't realistic. Its alright if you just put it on a very low value (like 0.01), and just paint the parts that should have more a bit reddish in the diffuse, but otherwise you would need a SSS map for it.
If your just doing a normal lighted render you don't need a SSS map really. It only becomes a bit of a necessity if your doing very high contrast renders.


")