3D-Daz Daz3d Art - Show Us Your DazSkill

5.00 star(s) 13 Votes

khumak

Engaged Member
Oct 2, 2017
3,873
3,925
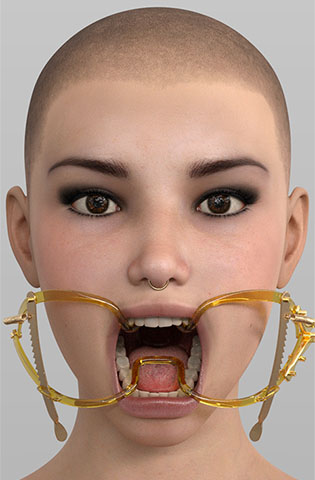
In this particular case, it is mainly the render. All I did here in postwork, where her eyes, and few highlights on her skin to make them a little bit more pop . As well as a bloom effect on the skull.
But I play heavily with the exposure triangle in testrenders before I do the final shot. (ShutterTime 1/45, f/stop 22, ISO 400.) I'm also using spectral rendering, which helps to make the colors look more natural in different light set ups.

For darker scenes I normally don't reduce the light in postwork, but increasing it. It is far more easier to amplify the light in poswtwork than reducing it. The easiest way to pop a dark scene is, to render it darker than intended and than duplicate the processed image in an additional layer and set its Mode to "screen".After that, play with the opacity of the screen layer.
I probably just haven't figured out what render settings to use for low light renders. The last render I tried to do with dark lighting turned out like this after letting it render for over 7 hours. I tried it again with just a headlamp and all other lights disabled and the same scene rendered without any spots in about 1 hour. Maybe the mirror just adds too much for my system to handle with multiple light sources?

lighting_7_hours.png
 
  • Like
Reactions: vebka and ravenhawk

Evic

Member
May 25, 2018
205
2,067
I probably just haven't figured out what render settings to use for low light renders. The last render I tried to do with dark lighting turned out like this after letting it render for over 7 hours. I tried it again with just a headlamp and all other lights disabled and the same scene rendered without any spots in about 1 hour. Maybe the mirror just adds too much for my system to handle with multiple light sources?
Try adding more light sources, even if they aren't bright it will make iray happy and it will render quicker. Also, avoid hard light sources behind the camera pointing at characters that have a wall behind them unless you really want that shadow. Put your brightest light source so that it casts the shadow you want and add the others to fill in where you need light. Almost any HDRI background can be a huge help and you can just adjust the intensity of that down for night scenes even if the HDRI is a bright sunny day, be creative and don't be afraid to remove walls and ceilings that can't be seen to let in light from the HDRI :)

Once you have the light coverage you want then you can play with tone mapping to get the brightness correct. A little de-saturation and whitepoint tweaking will help make it look like a night scene.
 

Deleted member 444674

Member
Game Developer
Feb 17, 2018
405
5,499
Took a little while, but I've finished my first "comic". As I said, it's not really a comic. It's the likes of what you've seen from an artist like Blackadder, Epoch Art or other similar creators. Just poses and expressions that tell a story.

20.jpg

It's a very tame comic, for now, considering it was meant to be like a 6-page short thing for DeviantArt and was meant as a wish fulfilled for someone else, but my mind took a complete left turn down "Fuck It Ave" and blew it up into 32 total pages. But my next ones, which will be made totally through my vision will be much more erotic than this.

Don't even know if I'm supposed to link it here, but I'll know soon enough.


Evic

Member
May 25, 2018
205
2,067
Perfectly! How did you get the fog effect ?
Thank you. Here is a good tutorial that will get you started: from that you can play around with various settings and different lights to get different effects. About the only thing you can't do with that methods is a good, heavy ground fog.

Also, some things have changed with iray since that was written, most importantly- you no longer need to keep the camera outside of the primitive you create (step 5 in the tutorial).
 

Deleted member 444674

Member
Game Developer
Feb 17, 2018
405
5,499
the comic looks interesting,nice camera work,beautiful brunettes, but again the strange color...
Could just be the tone mapping settings I used before rendering. I tend to play with the saturation, burn highlights, crush blacks and gamma until I get a look that's more defined in the art. The default settings using this environment doesn't make it look nearly as colorful. In fact, it looks almost gray in my eyes in the default settings. That's assuming we have the same or similar color profiles.
 

Evic

Member
May 25, 2018
205
2,067
Playing around with atmospheric cube to increase scene realism. Technique used based upon links provided by Evic.
Fun isn't it?

Scenes with fewer light sources will have more dramatic results. For example if you do a room with a single window and the light source outside that window you can get the typical god ray effect but if you use it on a small outdoor scene (or a room with many windows/lights) you get more of a haze since the light is coming in from so many directions. Photometric lights will also get you more defined effects compared to HDRI or mesh lights making it pretty easy to get a "smokey bar" effect with a couple of bright spotlights. SSS amount, transmitted measuring distance and scattering measurement distance will control the "density" of the effect, just make sure you always have the transmitted distance equal to or higher than the scattering distance or the scene can black out. Oh and if you can't get the coloring you want from your lights or the SSS settings don't forget that you can mess with the refraction color too.

It's kind of tricky though, identical settings in different scenes can yield dramatically different results.
 

Xavster

Well-Known Member
Game Developer
Mar 27, 2018
1,260
7,654
Fun isn't it?

Scenes with fewer light sources will have more dramatic results. For example if you do a room with a single window and the light source outside that window you can get the typical god ray effect but if you use it on a small outdoor scene (or a room with many windows/lights) you get more of a haze since the light is coming in from so many directions. Photometric lights will also get you more defined effects compared to HDRI or mesh lights making it pretty easy to get a "smokey bar" effect with a couple of bright spotlights. SSS amount, transmitted measuring distance and scattering measurement distance will control the "density" of the effect, just make sure you always have the transmitted distance equal to or higher than the scattering distance or the scene can black out. Oh and if you can't get the coloring you want from your lights or the SSS settings don't forget that you can mess with the refraction color too.

It's kind of tricky though, identical settings in different scenes can yield dramatically different results.
Certainly have a lot of messing around to do before I can say I have control over the result. One interesting thing to note is that the environment cube is the same in both scenes, however the camera distance and spotlights changed causing a very different result. Whilst I like the final result, the scattering is significantly increasing render times, hence I will likely have to keep the polygon count down.

Also in the 2nd image there is a bit of a discontinuity of colouring at the base of the forehead. Think it is resulting from the hair skullcap, however more investigation required.
 
5.00 star(s) 13 Votes